 Installing the CDT
| Installing the CDT |
Home • Installing MinGW • Installing MSYS • Installing the CDT • Verifying Installation | Using Eclipse for Homeworks |
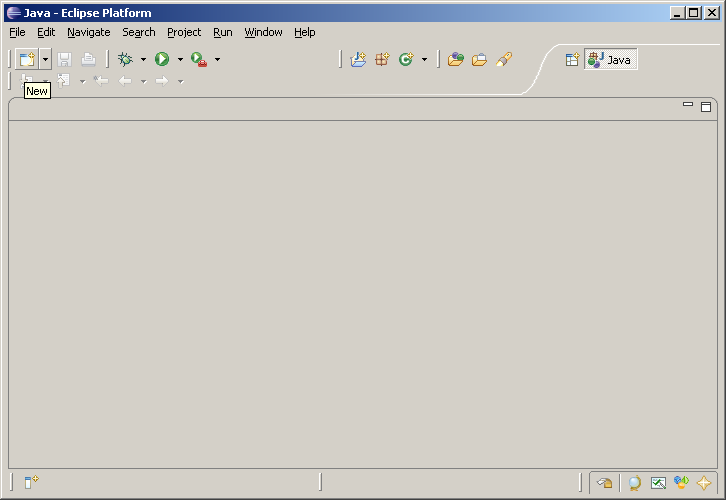 Inside Eclipse, click the New icon.
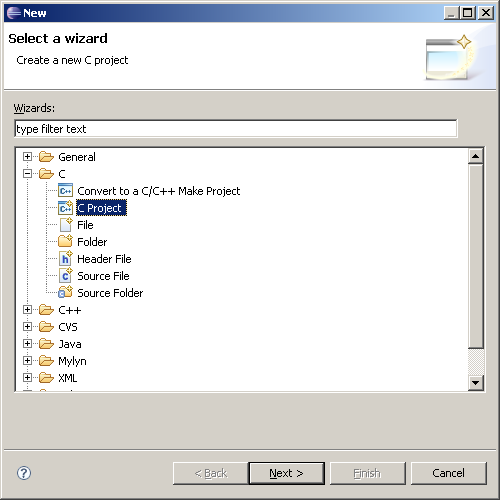 Expand the C folder and select C Project. Click Next.
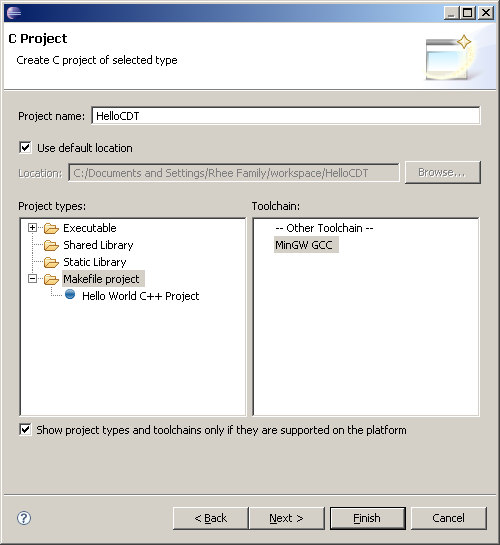 In the Project name textbox, type HelloCDT. On the left, select Makefile Project. On the right, select MinGW GCC and click Finish.
 In the window that pops up, check Remember my decision and click Yes.
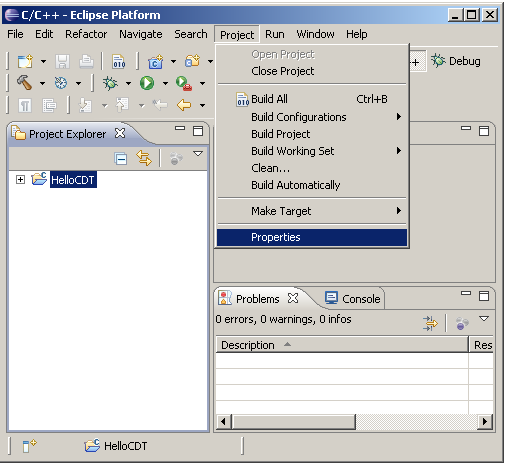 In the Project Explorer, select the "Hello CDT" project if it isn't already selected. Go to Project > Properties.
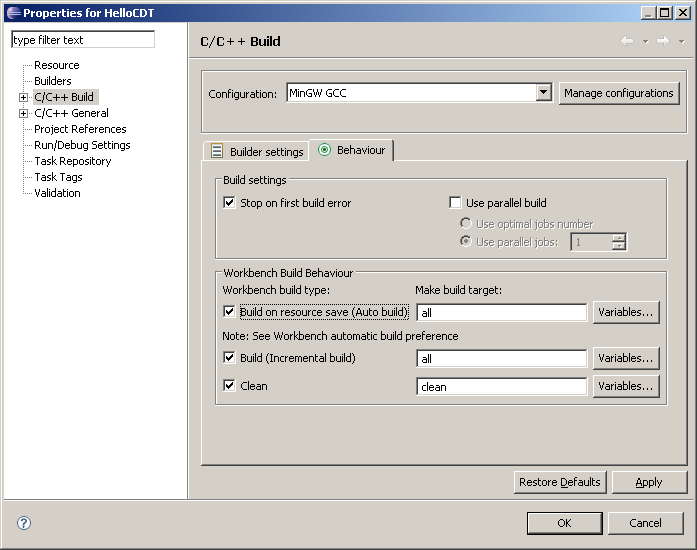 On the left, select C/C++ Build and click the Behavior tab. Check the box labeled Build on resource save (Auto build) and click OK.
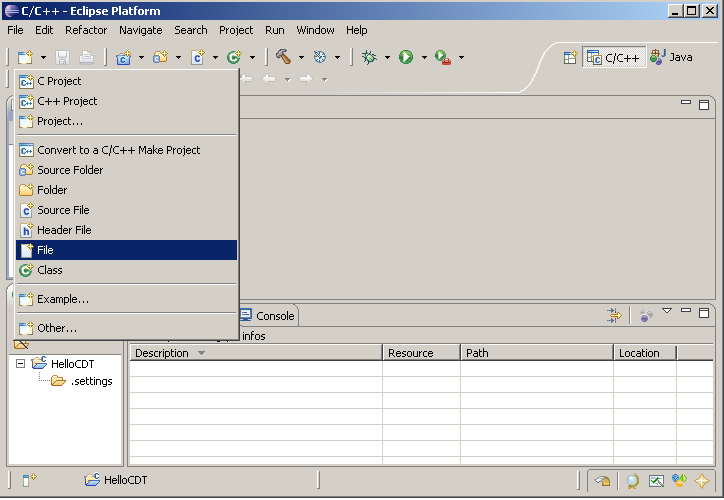 Click the arrow next to the New icon and click File.
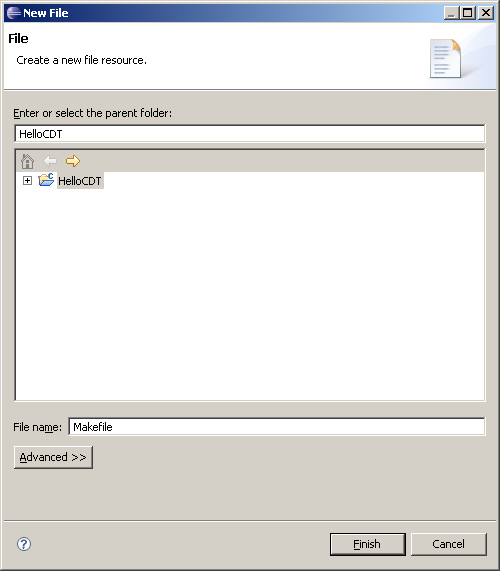 In the File name textfield near the bottom of the window, type Makefile and click Finish.
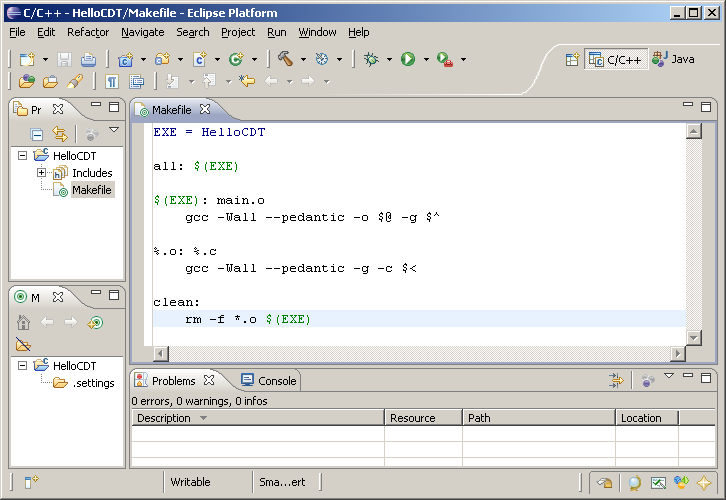 A new file named Makefile will be added to the project and opened for editing. Type in the following code and save it when you're done.
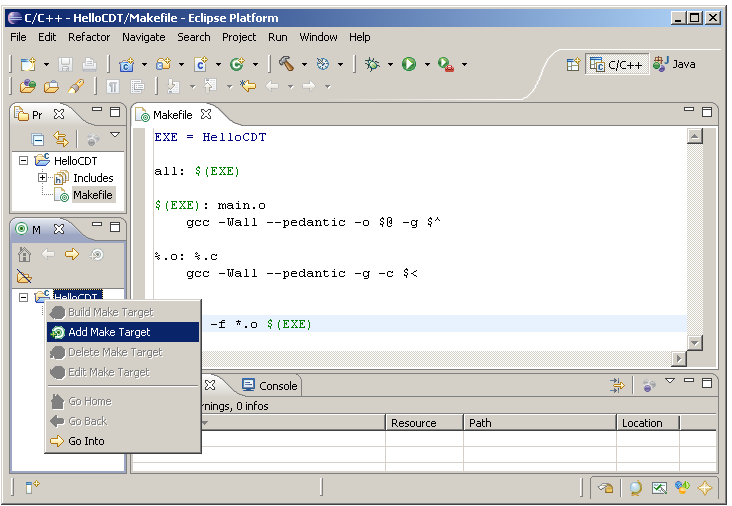 If the Make targets view is not already open, go to Window -> Show View -> Make Targets. Right click on the project name and click Add Make Target.
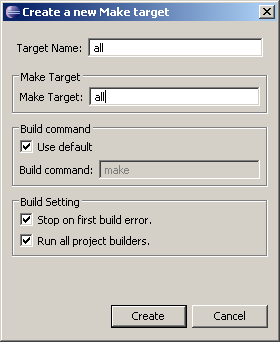
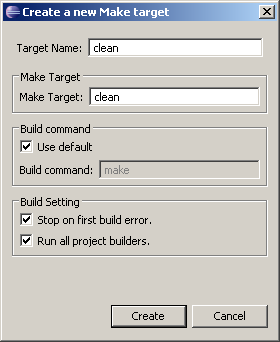 Create two make targets, all and clean.
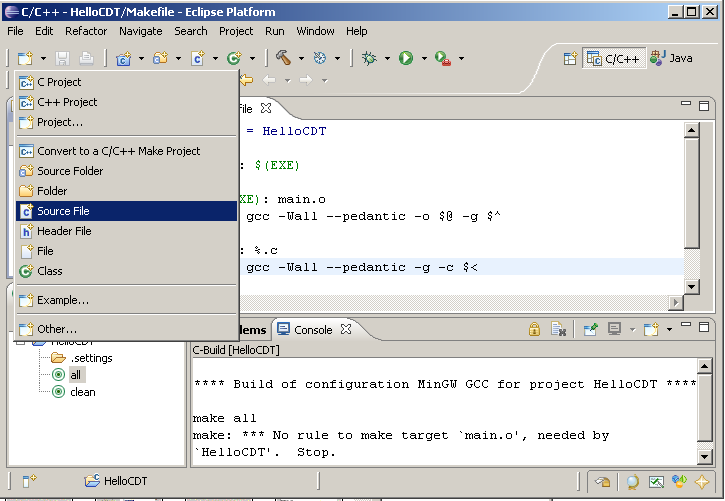 Click the arrow next to the New icon and click Source File.
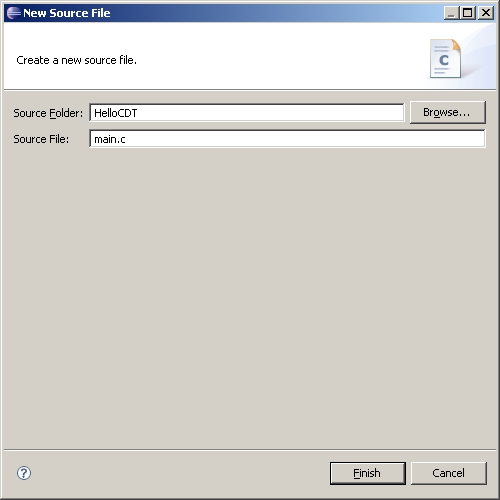 Type in main.c and click Finish.
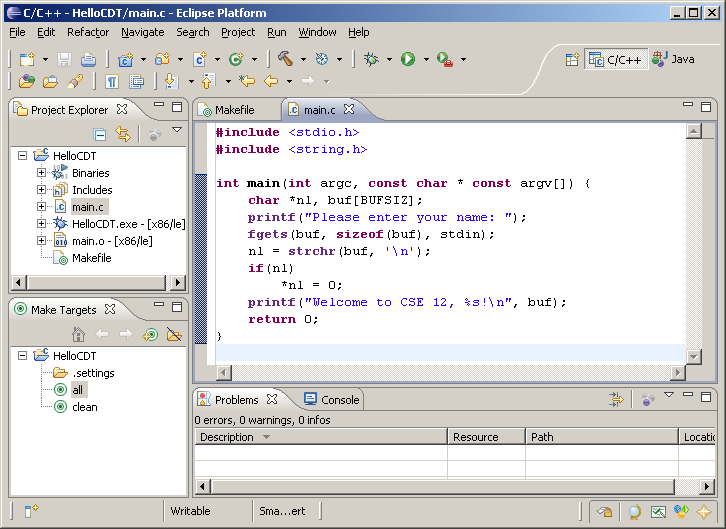 A new file named main.c will be added to the project and opened for editing. Type in the following code and save it when you're done.
After you copy the code to your editor, select all (Ctrl + A) and press Ctrl + Shift + F to automatically format your code.
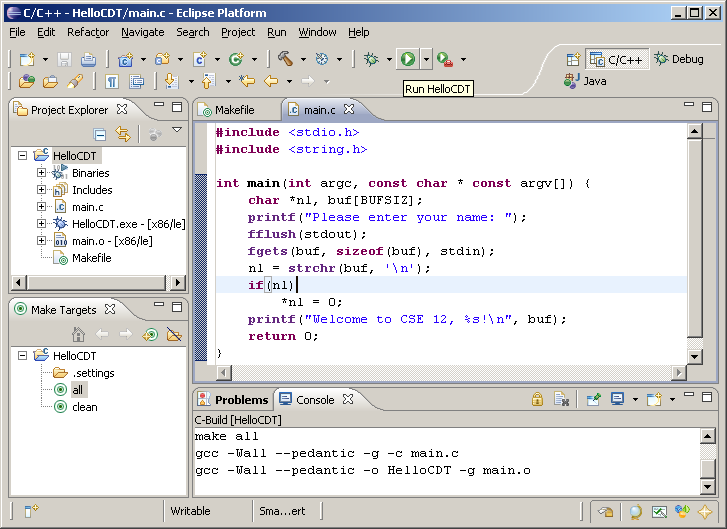 Build your project. There are several ways to build your project:
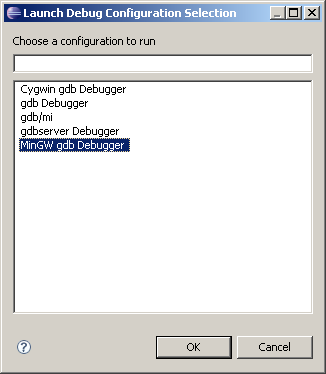 Select MinGW gdb Debugger and click OK.
Some users do not get this popup; which is OK.
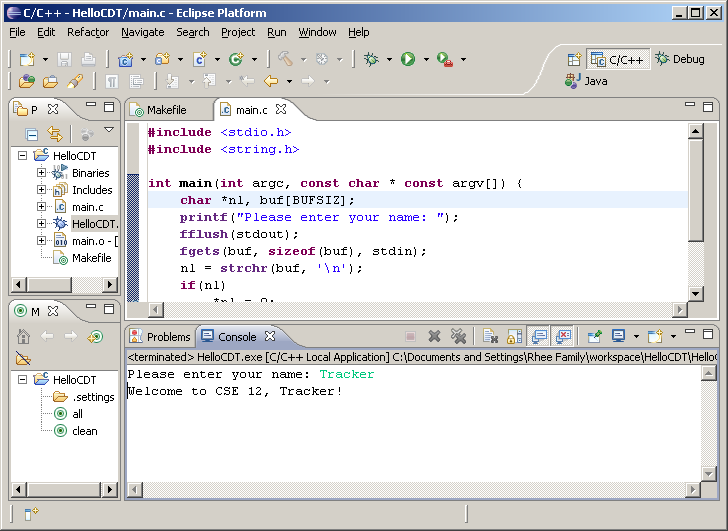 The output from the program's execution should show up in the console. Type in your name when prompted and hit <enter>.
| Installing the CDT |
Home • Installing MinGW • Installing MSYS • Installing the CDT • Verifying Installation | Using Eclipse for Homeworks |