 Overview
| Overview |
Home • Eclipse Overview • Installing Eclipse • Verifying Installation | Verifying Installation |
 Download and install the latest version of the Java Runtime Environment from http://www.java.com. Click Free Java Download and follow the onscreen instructions. You can verify that Java was installed on your computer by navigating to C:\Program Files and seeing that a Java\ directory exists.
 Download Eclipse IDE for Java Developers from http://www.eclipse.org/downloads/. Choose your operating system. This guide shows how to install eclipse for Windows. On the next page, click on the link after Download From: to download the zip file. You can choose to use one of the links under 'Get it Faster Here' if the download is too slow or results in an empty zip file.
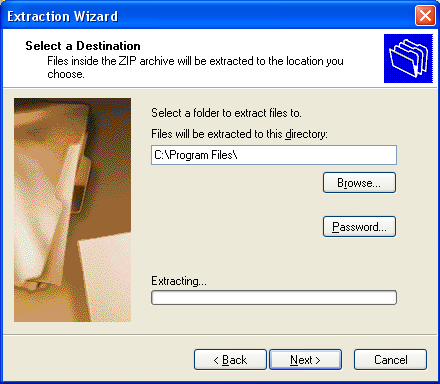 Extract the downloaded zip file to C:\Program Files\
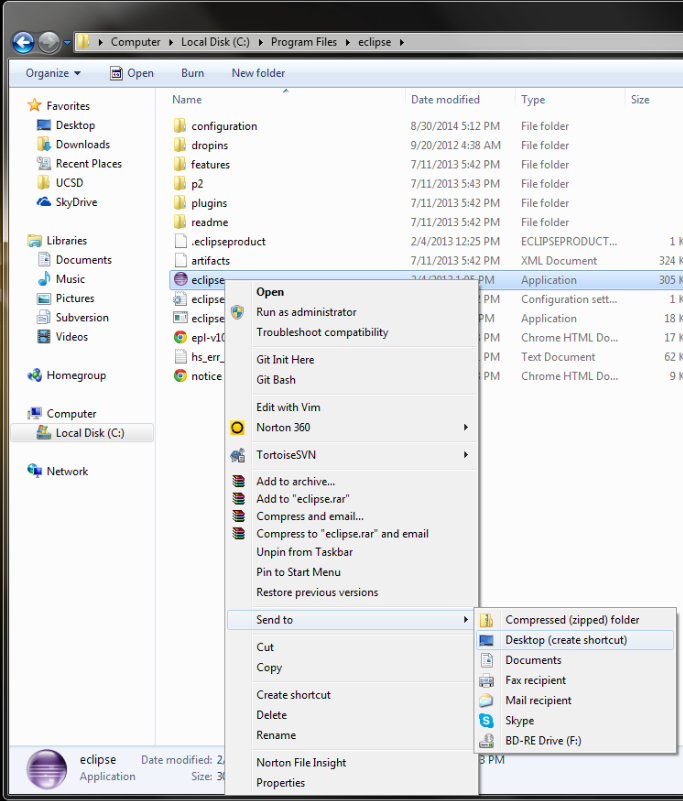 Navigate to the folder where Eclipse was extracted, C:\Program Files\eclipse, right click on eclipse.exe and click Send To -> Desktop (create shortcut)
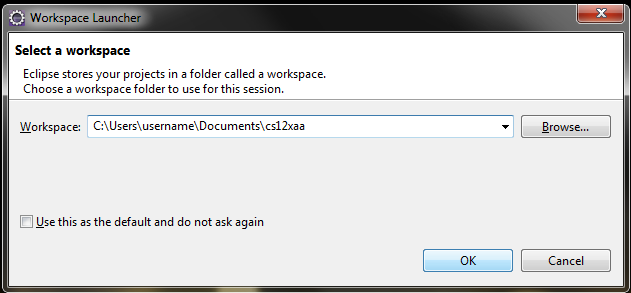 Start Eclipse by double clicking your newly created desktop icon. You will be prompted to select a workspace. Naming your workspace after your cs12x login can be helpful to distinguish workspaces that you may create for future classes such as cse30 or cse100.
What's a workspace? A workspace is the central hub for your projects. A workspace contains metadata that specifies the projects in that workspace, your run/debug configurations, IDE layouts and perspective preferences, and much more. While the workspace is a directory, and projects within that workspace are usually in the directory of the workspace, a project does not have to be in the physical directory of that workspace to appear in the logical list of projects in that workspace within Eclipse. Conversely, just because a project is in the physical workspace directory does not mean it is logically in the workspace within Eclipse.
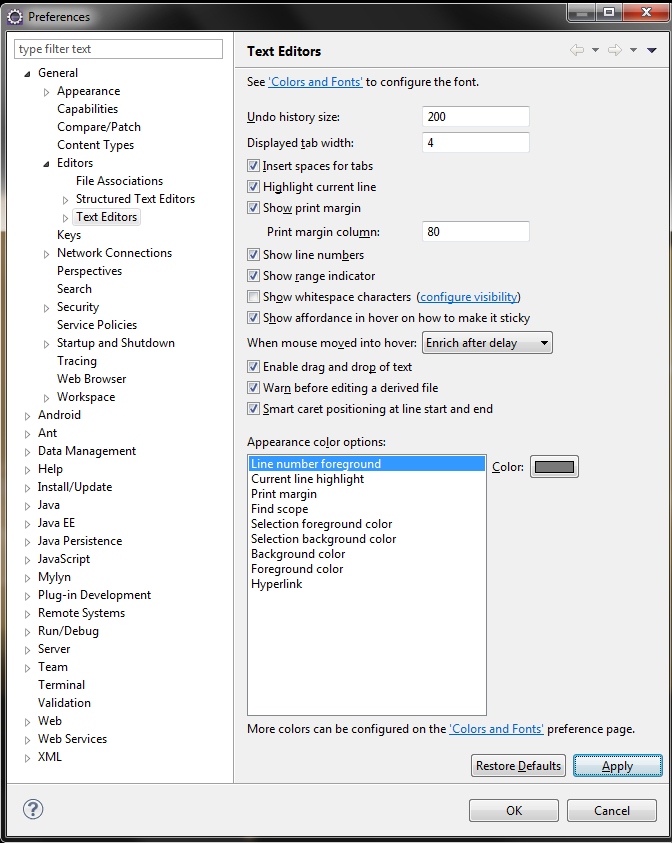 Go to Window -> Preferences. On the left, expand General -> Editors -> Text Editors. Check the following boxes:
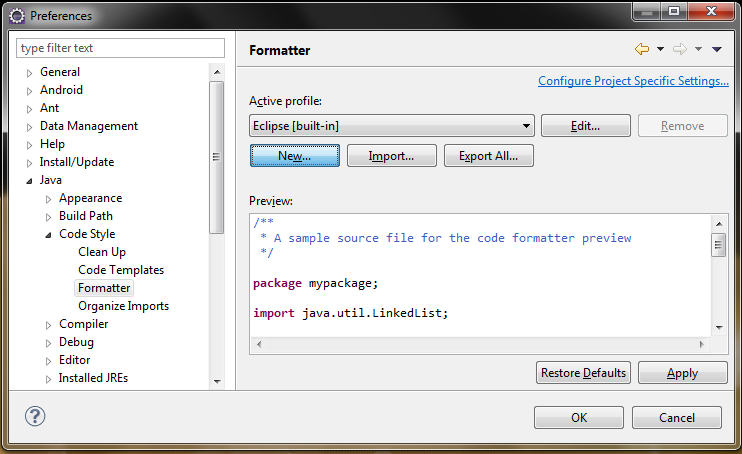 On the left, expand Java -> Code Style -> Formatter. Click New.
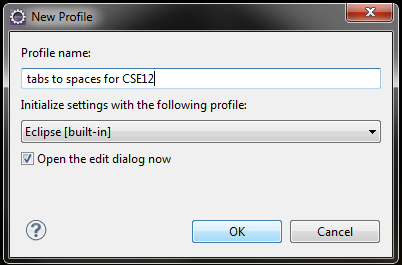 Type in a name for your new code formatter profile, such as tabs to spaces for CSE 12. Make sure settings are being initialized from Eclipse [built-in] and Open the edit dialog now is checked. Click Ok.
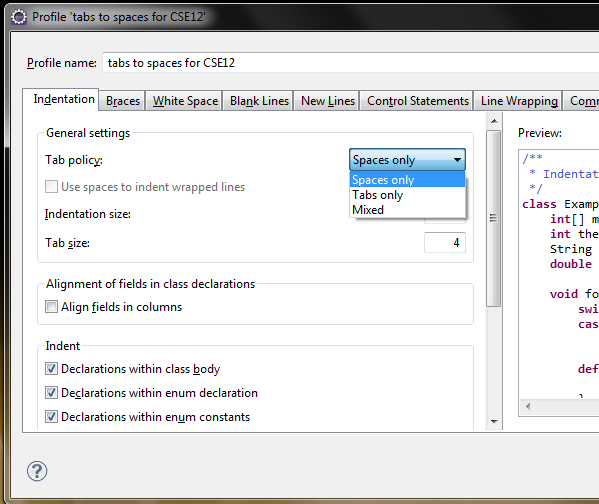 Select Spaces only from the Tab policy dropdown and click Apply and then Ok. Click Ok on the preferences dialog to close.
| Overview |
Home • Eclipse Overview • Installing Eclipse • Verifying Installation | Verifying Installation |