 Registering Visual C++
| Registering Visual C++ |
Home • VC++ Overview • Installing VC++ • Installing getopt • Registering VC++ • Verifying Installation |
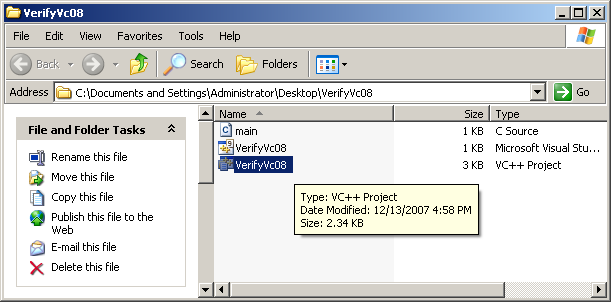 Download VerifyVc08.zip and extract it to a directory of your choosing. Open the newly extracted folder and double click VerifyVc08.vcproj.
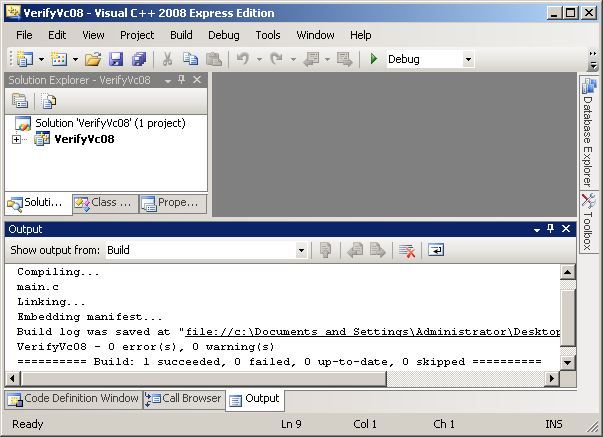 Inside Visual C++, go to Build -> Build Solution (F7). Look for the Output window, which can be found at View -> Output. If the build succeeds, go to the next step. If not, some common errors and their solutions are:
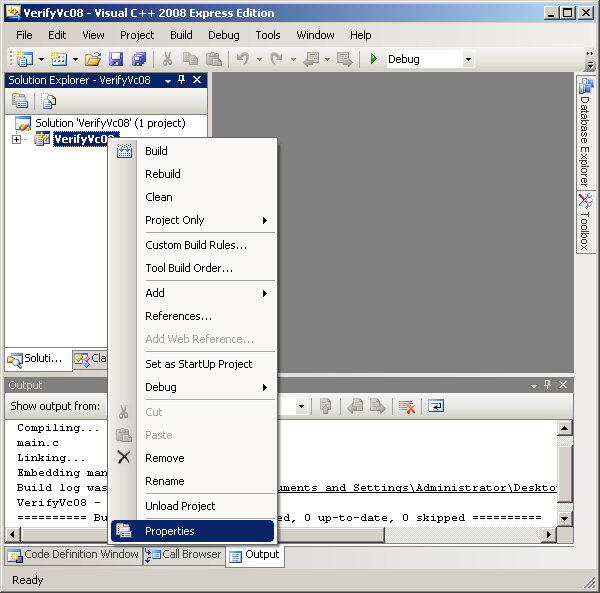 In the Solution Explorer, right click on VerifyVc08 and go to Properties.
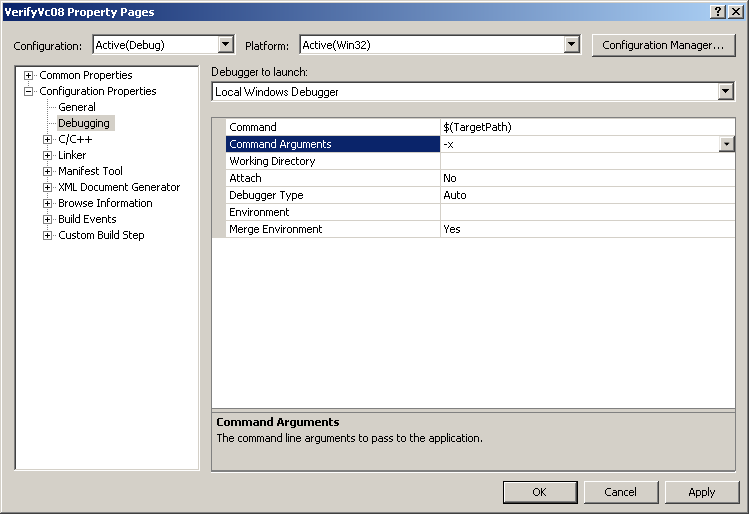 In the left tree, expand Configuration Properties -> Debugging.
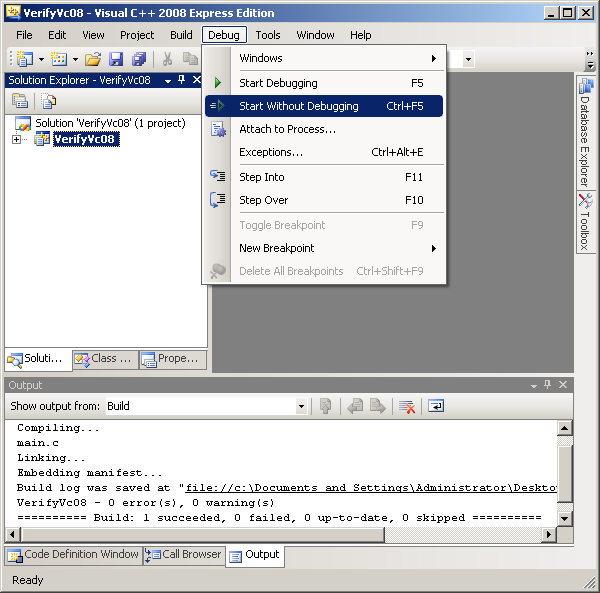 Run the project by going to Debug -> Start without Debugging (Ctrl + F5).
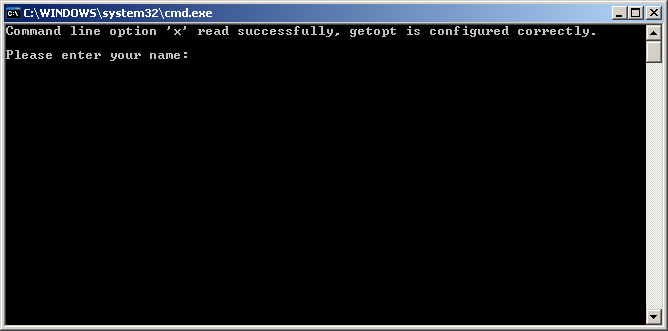 The program should display a message indicating that getopt was configured correctly. Enter your name when prompted to do so, and press enter.
| Registering Visual C++ |
Home • VC++ Overview • Installing VC++ • Installing getopt • Registering VC++ • Verifying Installation |